Maple Syrup in NH
Maple Syrup NH
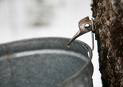
List of maple syrup producers, sap houses, supplies and articles about maple syrup in New Hampshire and NH maple sugaring.
Maple syrup weekend is a great way to get the kids out of the house in the late winter and early fall.
Sorting Options

no-photo
no-photo
no-photo
no-photo
no-photo
no-photo
no-photo
